# Installing the MCP server helper
https://mobilebuilds.app/guides/installing-the-mcp-server-helper/
Last updated: 2026-09-06
The MCP server is what actually answers when a coding assistant asks about your
builds. It ships as a small helper you download from inside Mobile Builds and
install once — after that it starts on its own and you can forget it's there.
## What it is
Mobile Builds is sandboxed, and a sandboxed app can't open a port for other
tools to talk to. So the server lives in its own app, `MobileBuildsMCPServer`,
running alongside Mobile Builds rather than inside it. It sits in the menu bar
with no Dock icon and no window of its own.
The two check each other's code signatures before they exchange anything, so a
mismatched or unsigned process gets nothing back. The helper holds no App Store
Connect credentials — it reads through Mobile Builds, which has to be running
and unlocked.
## Download it
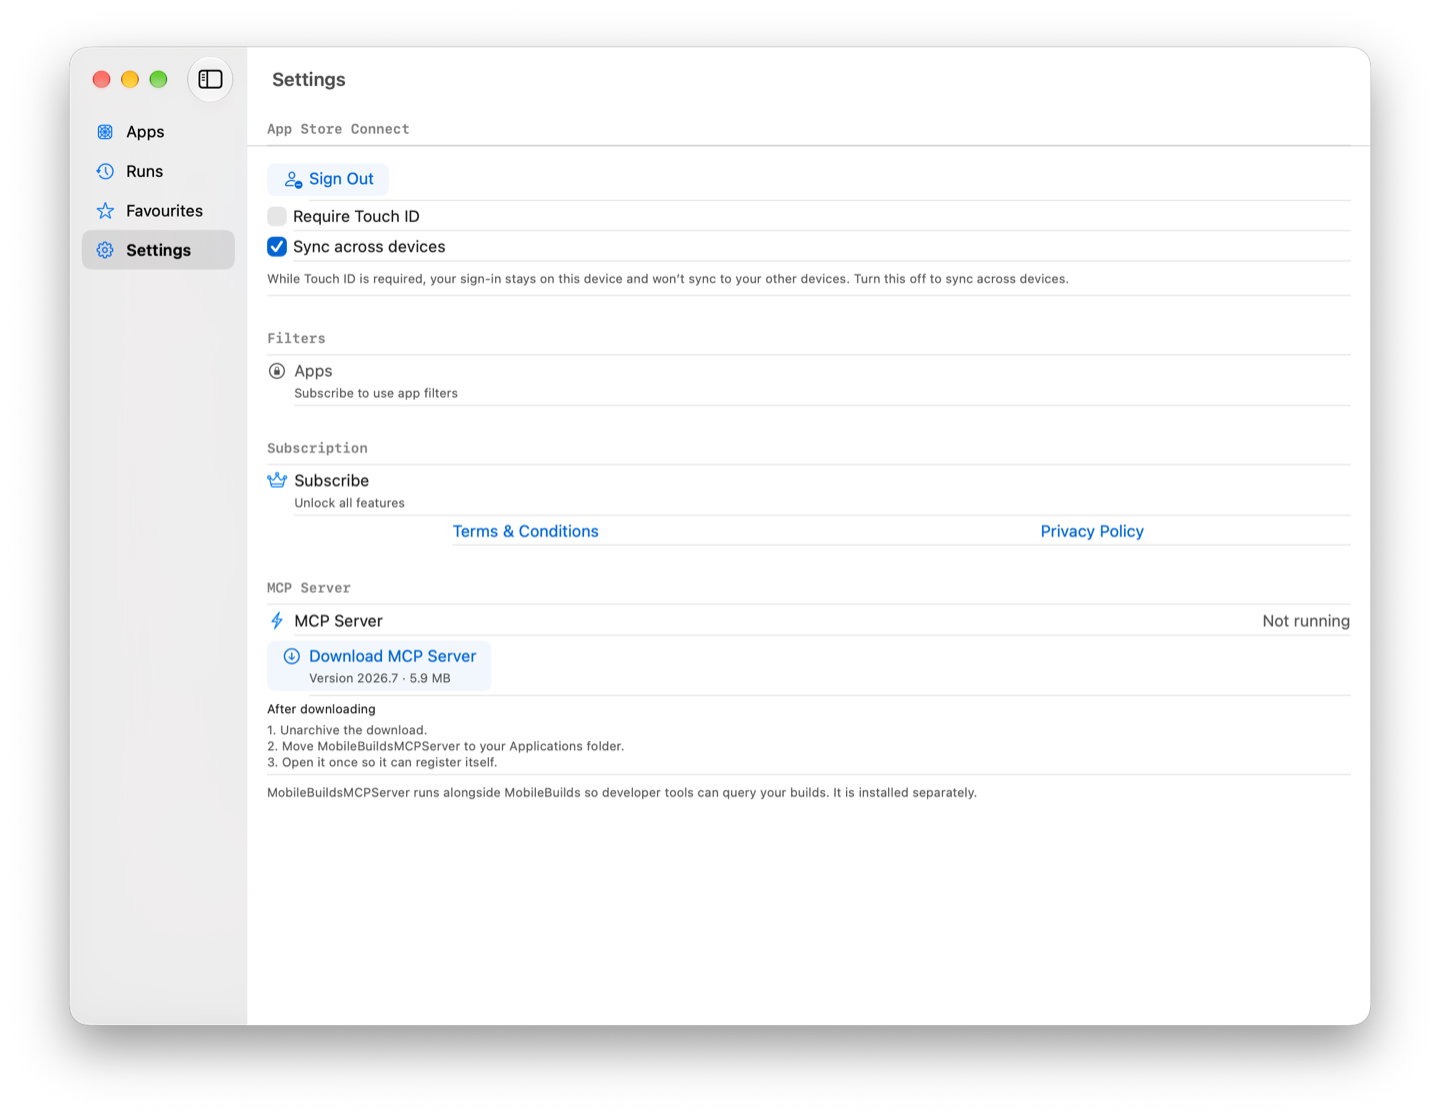
Open **Settings** and scroll to **MCP Server**. Until the helper is installed
the row reads **Not running**, with a download button under it showing the
version and size.
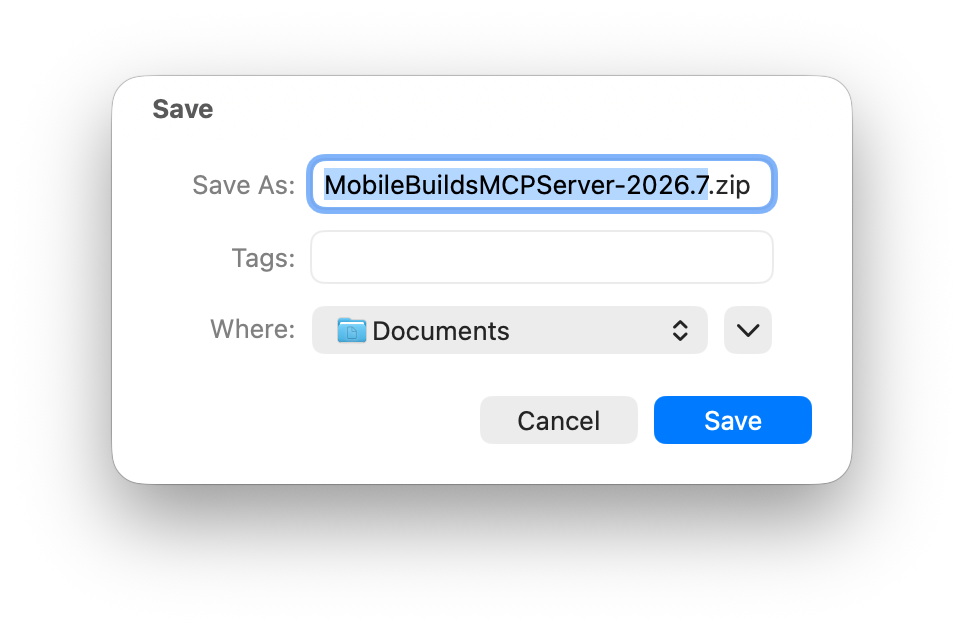
Choose **Download MCP Server** and pick somewhere to save the archive.
## Install it
Three steps, the same three the Settings pane lists:
1. Unarchive the download.
2. Move **MobileBuildsMCPServer** to your **Applications** folder.
3. Open it once so it can register itself.
The move matters — the helper registers itself from wherever it sits, so
launching it out of Downloads and tidying up later leaves Mobile Builds pointing
at nothing. Opening it that first time is what makes it start on its own
afterwards; from then on you don't launch it by hand.
## Check it's running
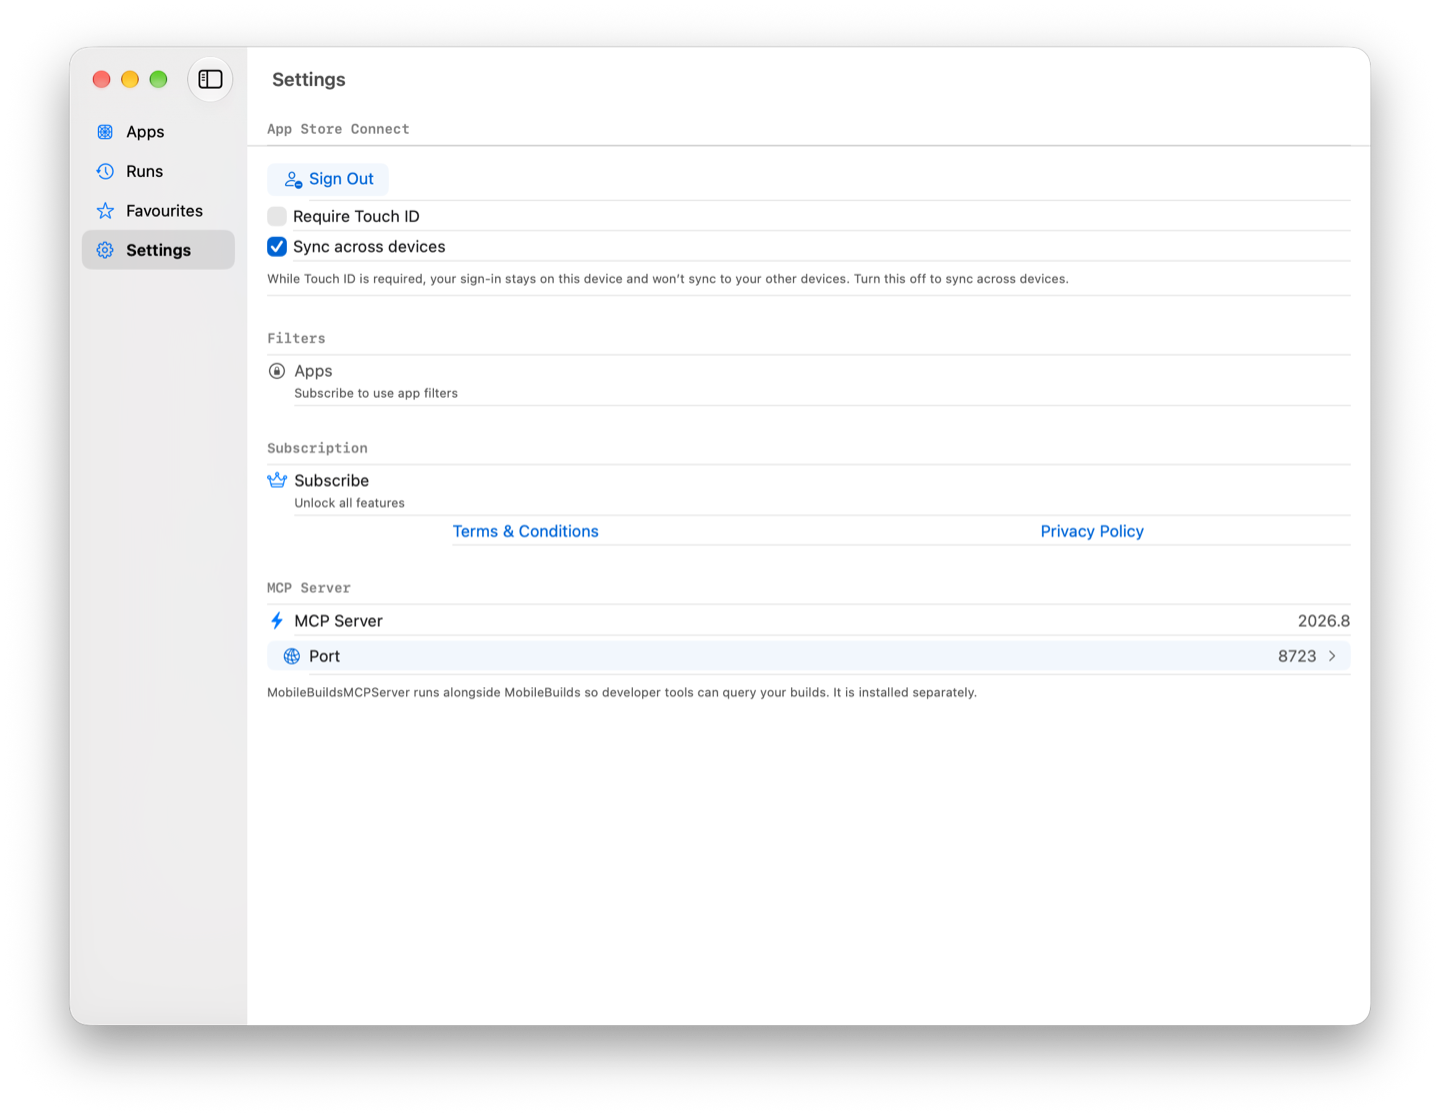
Go back to **Settings → MCP Server**. **Not running** is replaced by a version
number, and a **Port** row appears underneath.
For the other end of the chain — whether an assistant can reach it — ask "is
Mobile Builds connected?" in Xcode or Claude Code. That check is described in
[Using Mobile Builds from Xcode](/guides/using-mobile-builds-from-xcode/).
## If you need a different port
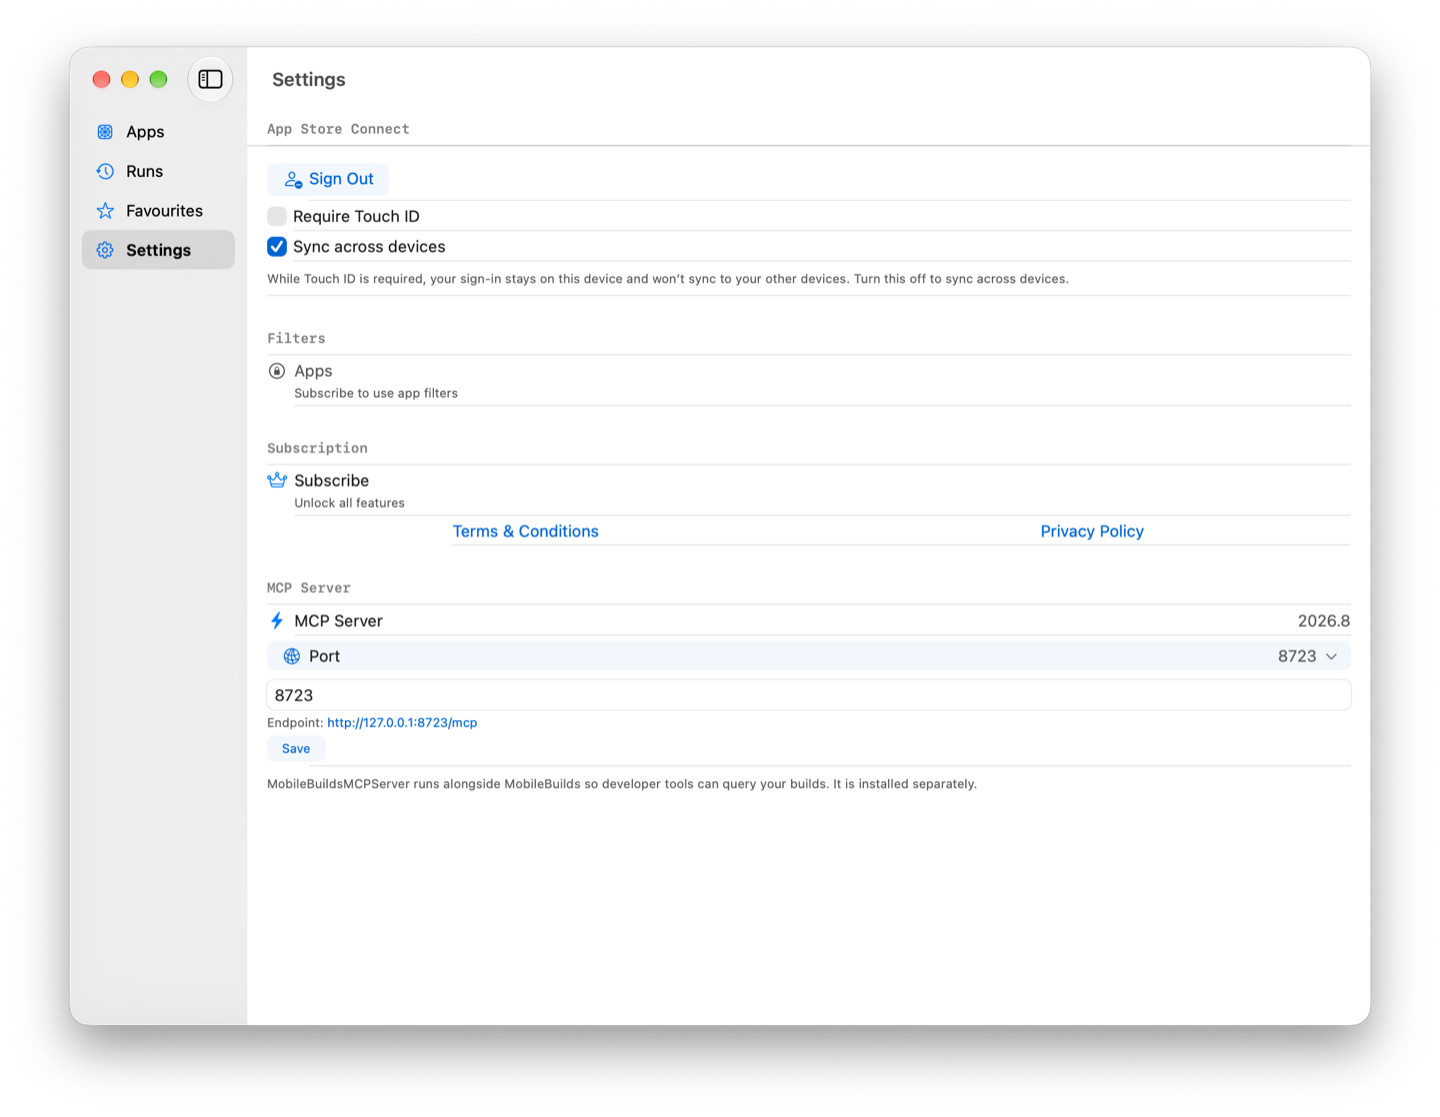
The server binds `8723` by default. If something else on your Mac has already
taken it, choose **Port**, type another number, and the endpoint line under the
field updates to match. Choose **Save**.
Changing it here doesn't reach your editor — Xcode keeps its own copy of the
configuration, under **Settings → Intelligence → MCP servers**, and you'll need
to point that at the new endpoint too.
## Related
- [Using Mobile Builds from Xcode](/guides/using-mobile-builds-from-xcode/)
- [Reading a build run](/guides/reading-a-build-run/)
- [Browsing your apps and workflows](/guides/browsing-your-apps-and-workflows/)
---
Mobile Builds — https://mobilebuilds.app/
Site index for language models: https://mobilebuilds.app/llms.txt